

EJBCA sudah mengeluarkan versi terbaru dari Community Edition milik mereka, yaitu EJBCA 6.15.2.1. Sayang sekali rasanya kalau saya tidak mencoba versi terbaru dari communtity edition tersebut dan melihat perubahan apa saja yang terjadi pada versi itu.
Sebenarnya cara instalasi dan konfigurasinya sama dengan beberapa versi sebelumnya. Namun agar semakin lengkap tulisan dari setiap versinya, berikut ini saya tuliskan cara melakukan instalasi EJBCA 6.15.2.1 dengan SoftHSM 2.5.0 pada Ubuntu Server 18.04
Alat dan Bahan
- EJBCA 6.15.1.2 → Download DI SINI
- Wildfly 10.0.0 Final → Download DI SINI
- SoftHSM 2.5.0 → Download DI SINI
- MariaDB 10.4 (Stable) → Cara install DI SINI
- MariaDB Java Client 2.1.0 → Download DI SINI
- OpenJDK 8
- JCE Policy 8 → Download DI SINI
Spek Server yang Digunakan
- RAM = 8 GB
- CPUs = 4
- Harddisk = 50 GB
Konfigurasi Firewall
EJBCA 6.15.2.1 menggunakan port 8080, 8442, 8443 untuk servis CA. Yang lainnya merupakan port internal (3306 untuk MySQL, 9990 untuk JBoss Admin, dll). Kita tidak perlu mengubah port tersebut pada aplikasi EJBCAnya langsung.
Jika kita mau menggunakan port standar yang digunakan WEB, silahkan atur Port Forwarding pada iptables. Kita bisa melakukannya dengan cara:
sudo vi /etc/iptables.rules
kemudian masukkan:
### Start iptables ###

# Firewall configuration written by system-config-firewall
# Manual customization of this file is not recommended.
*mangle
:PREROUTING ACCEPT [0:0]
:INPUT ACCEPT [0:0]
:FORWARD ACCEPT [0:0]
:OUTPUT ACCEPT [0:0]
:POSTROUTING ACCEPT [0:0]
-A PREROUTING -i ens32 -p tcp --dport 80 -j MARK --set-mark 0x64
-A PREROUTING -i ens32 -p tcp --dport 442 -j MARK --set-mark 0x65
-A PREROUTING -i ens32 -p tcp --dport 443 -j MARK --set-mark 0x66
COMMIT
*nat
:PREROUTING ACCEPT [0:0]
:OUTPUT ACCEPT [0:0]
:POSTROUTING ACCEPT [0:0]
-A PREROUTING -i ens32 -p tcp --dport 80 -m mark --mark 0x64 -j DNAT --to-destination :8080
-A PREROUTING -i ens32 -p tcp --dport 442 -m mark --mark 0x65 -j DNAT --to-destination :8442
-A PREROUTING -i ens32 -p tcp --dport 443 -m mark --mark 0x66 -j DNAT --to-destination :8443
COMMIT

*filter
:INPUT ACCEPT [0:0]
:FORWARD ACCEPT [0:0]
:OUTPUT ACCEPT [0:0]
-A INPUT -m state --state ESTABLISHED,RELATED -j ACCEPT
-A INPUT -p icmp -j ACCEPT
-A INPUT -i lo -j ACCEPT
-A INPUT -i ens32 -m state --state NEW -m tcp -p tcp --dport 8080 -m mark --mark 0x64 -j ACCEPT
-A INPUT -i ens32 -m state --state NEW -m tcp -p tcp --dport 8442 -m mark --mark 0x65 -j ACCEPT
-A INPUT -i ens32 -m state --state NEW -m tcp -p tcp --dport 8443 -m mark --mark 0x66 -j ACCEPT
-A INPUT -m state --state NEW -m tcp -p tcp --dport 443 -j ACCEPT
-A INPUT -m state --state NEW -m tcp -p tcp --dport 2244 -j ACCEPT
-A INPUT -m state --state NEW -m tcp -p tcp --dport 80 -j ACCEPT
-A INPUT -m state --state NEW -m tcp -p tcp --dport 9990 -j ACCEPT
-A INPUT -m state --state NEW -m tcp -p tcp --dport 442 -j ACCEPT
-A INPUT -j REJECT --reject-with icmp-host-prohibited
-A FORWARD -j REJECT --reject-with icmp-host-prohibited
COMMIT

Agar iptables tersebut berjalan secara otomatis pada saat kita merestart server, maka kita perlu menambahkannya ke dalam rc.local. Caranya:
sudo vi /etc/rc.local
kemudian masukkan perintah berikut sebelum exit 0:
iptables-restore < /etc/iptables.rules

Restart Server dan iptables tersebut otomatis akan aktif.
Instalasi Beberapa Paket
Seperti namanya EJBCA (Enterprise Java Bean Certification Authority), maka kita membutuhkan java agar software ini dapat berjalan. Versi OpenJDK yang harus diinstal adalah versi 8. Cara memasangnya:
sudo apt-get install openjdk-8-jdk

Usai menyelesaikan instalasi openjdk-8, kita akan sedikit me-replace beberapa file yang ada di /usr/lib/jvm/java-1.8.0-openjdk-amd64/jre/lib/security. 2 file yang harus di replace adalah local_policy.jar dan US_export_policy.jar.
Bagaimana cara me-replace-nya?
- Download JCE pada link yang sudah saya sertakan di atas.
- Setelah berhasil di download, ekstrak file tersebut dan kamu akan menemukan sebuah folder bernama jce_policy-8. Cara ekstraknya adalah seperti berikut:
cd /home/user/Downloads
unzip jce_policy-8.zip
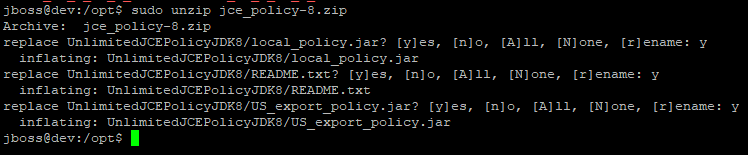
unzip JCE Policy - Setelah berhasil di ekstrak, copy-kan 2 file yang sudah saya sebutkan di atas ke dalam folder /usr/lib/jvm/java-1.8.0-openjdk-amd64/jre/lib/security. Caranya:
cp jce_policy-8/UnlimitedJCEPolicyJDK8/local_policy.jar /usr/lib/jvm/java-1.8.0-openjdk-amd64/jre/lib/security
cp jce_policy-8/UnlimitedJCEPolicyJDK8/US_export_policy.jar /usr/lib/jvm/java-1.8.0-openjdk-amd64/jre/lib/security

Proses copy
Berikutnya kita akan memasang beberapa paket tambahan yaitu ant, ant-optional, dan unzip. Caranya:
sudo apt-get install ant ant-optional unzip

Setelah melakukan instalasi openjdk-8 dan beberapa paket lainnya, ada baiknya memeriksa versi java terlebih dahulu apakah sudah sesuai dengan yang kita inginkan atau belum. Caranya:
java -version

Dari hasil di atas didapatkan kalau versi yang terinstal adalah versi 8.
Instalasi dan Konfigurasi MariaDB
Tahap selanjutnya adalah melakukan instalasi database kemudian mengonfigurasinya. Konfigurasi yang saya lakukan disini hanyalah konfigurasi biasa, tanpa Security yang cukup baik (hanya untuk keperluan percobaan).
Untuk kalian yang ingin mengimplementasikannya di production, pastikan mengamankan direktori mysql dan meng-update /etc/mysql/my.cnf sebelum menjalankan service database. Konfigurasi ini juga menggunakan utf-8 encoding. Mari kita mulai instalasinya terlebih dahulu:
Untuk melakukan instalasi mariaDB 10.4 (stable) pada Ubuntu Server 18.04. Tambahkan dulu repositorinya dengan cara:
sudo apt-get install software-properties-common
sudo apt-key adv --recv-keys --keyserver hkp://keyserver.ubuntu.com:80 0xF1656F24C74CD1D8
sudo add-apt-repository 'deb [arch=amd64,arm64,ppc64el] http://mirrors.n-ix.net/mariadb/repo/10.4/ubuntu bionic main'

Sesudah itu, update paket ubuntu dan install MariaDB 10.4 Server. Caranya:
sudo apt-get update
sudo apt-get install mariadb-server
sudo mysql_secure_installation


Setelah MariaDB selesai terinstal, tahap selanjutnya adalah mengubah beberapa konfigurasi yang ada pada my.cnf. Salah satunya adalah menambahkan binlog_format=row. Kalau menggunakan MariaDB, kemungkinan servicenya menolak untuk berjalan karena InnoDB tidak bisa memproses log binary-nya. Tambahkan binlog_format=row seperti konfigurasi di bawah untuk memecahkan masalah tersebut. Tambahkan juga beberapa item lain yang belum ada di my.cnf kalian ya.
sudo vi /etc/mysql/my.cnf
[client]
 port                    = 3306
 socket                  = /var/run/mysqld/mysqld.sock
 default-character-set   = utf8

[mysqld]
 user                    = mysql
 socket                  = /var/run/mysqld/mysqld.sock
 port                    = 3306
 basedir                 = /usr
 datadir                 = /var/lib/mysql
 tmpdir                  = /tmp
 lc_messages_dir         = /usr/share/mysql
 lc_messages             = en_US
 skip-external-locking

#UTF-8
 character-set-server    = utf8
 collation-server        = utf8_unicode_ci
 init-connect            = 'SET NAMES utf8'

bind-address             = 127.0.0.1
#Binary Logging
 log_bin                 = /var/log/mysql/mariadb-bin
 log_bin_index           = /var/log/mysql/mariadb-bin.index
 binlog_format           = ROW
 expire_logs_days        = 10
 max_binlog_size         = 100M
 server-id               = 1
 slow_query_log_file     = /var/log/mysql/mariadb-slow.log
 long_query_time         = 10
Kalau sudah beres, jangan lupa untuk mengubah kepemilikan my.cnf tersebut menjadi milik mysql. caranya:
sudo chown mysql:mysql /etc/mysql/my.cnf

Pada konfigurasi my.cnf di atas, kita memasukkan lokasi untuk meletakkan log. Guna mengamankan log tersebut (karena log tersebut mengandung data sertifikat kita), maka kita harus mengatur izin yang terbatas soal siapa yang bisa mengaksesnya. Caranya:
chown -R mysql:mysql /var/log/mysql
chmod -R 750 /var/log/mysql/

Setelah MariaDB terpasang dan konfigurasinya selesai dilakukan, tahap berikutnya adalah membuat database untuk EJBCA 6.15.2.1 dan juga sebuah user untuk mengakses database EJBCA 6.15.2.1 tersebut (jangan menggunakan user root untuk EJBCA 6.15.2.1 dalam mengakses database-nya). Caranya:
mysql -u root -p
create database <nama_db>;
grant all privileges on <nama_db>.* to '<user>'@'<ip>' identified by '<password>';
flush privileges;
exit

Jika sudah, lakukan verifikasi dengan cara login dengan menggunakan user yang baru saja dibuat tadi dan test aksesnya. Caranya:
mysql -u <user_db> -p
use <db_ejbca>;
show grants for '<user_db>@'<ip>';
exit

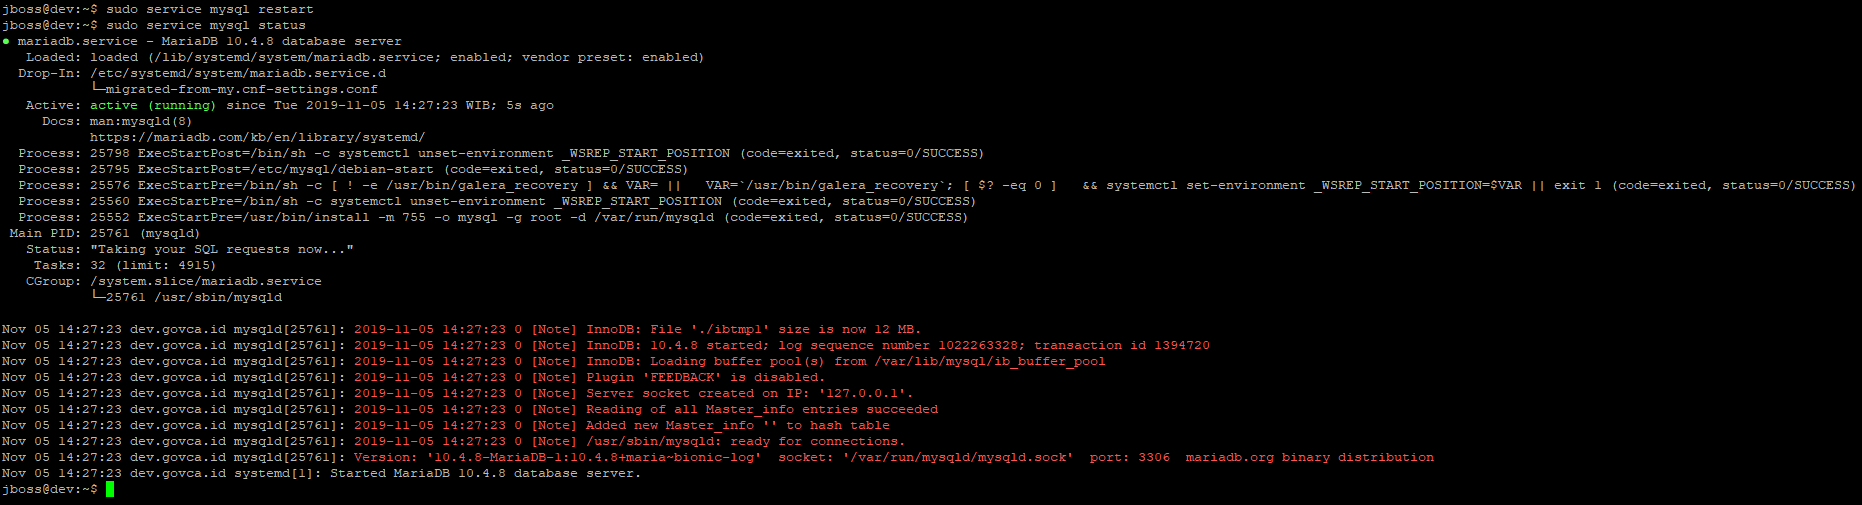
Pada bagian akhir, restart service database tersebut dengan perintah:
sudo service mysql restart
Instalasi dan Konfigurasi Wildfly
Untuk instalasi dan konfigurasi Wildfly, silakan buka link INI.
Ketika sudah selesai melakukan instalasi Wildfly dengan menggunakan script, sekarang saatnya untuk melakukan sedikit konfigurasi. Yang akan diatur pertama adalah JAVA_HOME dan JAVA_OPTS.
Ubah kedua parameter tersebut dengan cara:
vi /opt/wildfly/bin/standalone.conf
JAVA_HOME=/usr/lib/jvm/java-1.8.0-openjdk-amd64
JAVA_OPTS="-Xms2048m -Xmx2048m -Djava.net.preferIPv4Stack=true"

Jika sudah, berikutnya adalah menambahkan database driver ke dalam Wildfly. Caranya adalah dengan meng-copy file driver MariaDB (yang bisa kalian unduh pada link di atas) ke dalam salah satu direktori wildfly. Tahapannya:
cp mariadb-java-client-2.1.0.jar /opt/wildfly/standalone/deployments/mariadb-java-client.jar
ls

tambahkan juga beberapa konfigurasi berikut pada bashrc. Caranya:
vi /home/$nama_user/.bashrc
export JAVA_HOME=/usr/lib/jvm/java-1.8.0-openjdk-amd64/
export PATH=$JAVA_HOME/bin:$PATH
export JBOSS_HOME=/opt/wildfly
export PATH=$PATH:$JBOSS_HOME/bin:$PATH
export APPSRV_HOME=/opt/wildfly
export PATH=$JBOSS_HOME/bin:$PATH
export EJBCA_HOME=/opt/ejbca
export PATH=$EJBCA_HOME/bin:$PATH
export CLASSPATH=$JAVA_HOME/jre/lib/ext:$CLASSPATH

Jika sudah selesai, restart service wildfly dan pastikan service-nya berjalan dengan normal. Caranya:
sudo service widlfly restart
sudo service wildfly status

Konfigurasi User Admin untuk Wildfly Web
Jika kita mengakses console Wildfly via web pada tahap ini melalui http://<ip atau domain>:9990 maka yang tampil adalah seperti berikut:

Hal itu disebabkan oleh belum adanya Admin User yang dibuat untuk mengakses console tersebut. Untuk itu kita perlu membuatnya. Caranya:
cd /opt/wildfly/bin
sh add-user.sh
Maka akan muncul pertanyaan seperti berikut:
What type of user do you wish to add?
 a) Management User (mgmt-users.properties)
 b) Application User (application-users.properties)
(a):

Enter the details of the new user to add.
Using realm 'ManagementRealm' as discovered from the existing property files.
Username : xxxx
Password recommendations are listed below. To modify these restrictions edit the add-user.properties configuration file.
 - The password should be different from the username
 - The password should not be one of the following restricted values {root, admin, administrator}
 - The password should contain at least 8 characters, 1 alphabetic character(s), 1 digit(s), 1 non-alphanumeric symbol(s)
Password :
WFLYDM0101: Password should have at least 1 digit.
Are you sure you want to use the password entered yes/no? yes
Re-enter Password :
What groups do you want this user to belong to? (Please enter a comma separated list, or leave blank for none)[ ]:
About to add user 'jadmin' for realm 'ManagementRealm'
Is this correct yes/no? yes
Added user 'xxxx' to file '/opt/wildfly-10.0.0.Final/standalone/configuration/mgmt-users.properties'
Added user 'xxxx' to file '/opt/wildfly-10.0.0.Final/domain/configuration/mgmt-users.properties'
Added user 'xxxx' with groups to file '/opt/wildfly-10.0.0.Final/standalone/configuration/mgmt-groups.properties'
Added user 'xxxx' with groups to file '/opt/wildfly-10.0.0.Final/domain/configuration/mgmt-groups.properties'
Is this new user going to be used for one AS process to connect to another AS process?
e.g. for a slave host controller connecting to the master or for a Remoting connection for server to server EJB calls.
yes/no? no
- “What type of user do you wish to add?” → isi dengan “a”
- “Realm” → enter saja.
- “username” → Isi dengan username yang kalian mau.
- “Password” → Isi dengan password yang kalian mau.
- “Re-Enter Password” → Ulangi kembali dengan password yang sama.
- “is this correct” → pilih “yes”
- “is this new user going to …..” → pilih “no”
Pada saat ini seharusnya kita sudah bisa mengakses interface dari Wildfly Web Console dan mengganti beberapa item. Namun pada saat ini, kita belum perlu untuk mengganti apapun:
- Ini adalah user spesifik untuk JBoss yang tidak digunakan dimanapun.
- Ini adalah tahapan yang bagus untuk mengambil snapshot vm.
Sekarang mari kita coba user tersebut. caranya masuk ke browser dan ketikkan http://<ip atau domain>:9990/console/App.html. Maka akan muncul tampilan seperti berikut:

Masukkan username dan password sesuai dengan yang baru saja kita input. Apabila benar maka akan muncul tampilan seperti berikut:

Menambahkan Data Source
Sekarang service Wildfly sudah berjalan, kini kita bisa menambahkan data source. Kita akan melakukan ini melalui CLI-nya JBoss, yang akan mengupdate konfigurasi yang berada pada file Standalone.xml. Sebelum melakukan perubahan maka ada baiknya kita membackup konfigurasi awal terlebih dahulu. Caranya (masih dengan user jboss):
cd /opt/wildfly/standalone/configuration
cp standalone.xml standalone.xml.bak
Sekarang kita akan menuju JBoss CLI dan melakukan beberapa perubahan. Caranya:
cd /opt/wildfly/bin
sh jboss-cli.sh
connect
Lalu jalankan perintah berikut:
data-source add --name=ejbcads --driver-name="mariadb-java-client.jar" --connection-url="jdbc:mysql://127.0.0.1:3306/<nama_db>" --jndi-name="java:/EjbcaDS" --use-ccm=true --driver-class="org.mariadb.jdbc.Driver" --user-name="<nama_user>" --password="<password_user>" --validate-on-match=true --background-validation=false --prepared-statements-cache-size=50 --share-prepared-statements=true --min-pool-size=5 --max-pool-size=150 --pool-prefill=true --transaction-isolation=TRANSACTION_READ_COMMITTED --check-valid-connection-sql="select 1;"
:reload
Setelah perintah tersebut dieksekusi maka hasil keluarannya adalah “Success” (seperti pada gambar di bawah).

Hal yang kita lakukan pada CLI ini mendefinisikan driver mariadb dan koneksi yang ada pada /opt/wildfly/standalone/configuration/standalone.xml, kemudian me-reload JBoss.
Hasilnya akan terlihat pada standalone.xml seperti gambar berikut:

Sebagai bukti lagi kalau connector tersebut sudah masuk, kita akan melihat pada log yang tertera di file server.log yang ada pada folder /opt/wildfly/standalone/log/. Namun sebelumnya kita harus me-restart service wildfly yang sedang berjalan. Caranya:
service wildfly restart
Ketika kalian menemukan mariadb-java-client.jar, maka datasource tersebut sudah dapat dipastikan masuk.

Konfigurasi WildFly Remoting
EJBCA 6.15.2.1 perlu menggunakan JBOSS Remoting untuk EJBCA CLI agar bisa bekerja. Nah, kita akan mengkonfigurasi JBOSS Remoting tersebut. Kita akan menggunakan port yang berbeda dan memulainya dengan menghapus konfigurasi yang dulu pernah ada. Caranya:
cd /opt/wildfly/bin
sh jboss-cli.sh
connect
/subsystem=remoting/http-connector=http-remoting-connector:remove
/subsystem=remoting/http-connector=http-remoting-connector:add(connector-ref="remoting",security-realm="ApplicationRealm")
/socket-binding-group=standard-sockets/socket-binding=remoting:add(port="4447")
/subsystem=undertow/server=default-server/http-listener=remoting:add(socket-binding=remoting)
:reload

Tunggu sampai proses reload selesai dengan cara mengecek log yang ada pada server.log, baru kemudian lanjutkan ke proses berikutnya
Konfigurasi Logging
Untuk mengkonfigurasi log yang ada pada Wildfly, Kita harus bisa mengganti log secara dinamis. Pada contoh ini DEBUG akan diaktifkan
cd /opt/wildfly/bin
sh jboss-cli.sh
connect
/subsystem=logging/logger=org.ejbca:add
/subsystem=logging/logger=org.ejbca:write-attribute(name=level, value=DEBUG)
/subsystem=logging/logger=org.cesecore:add
/subsystem=logging/logger=org.cesecore:write-attribute(name=level, value=DEBUG)

Instalasi EJBCA 6.15.2.1
Sebelum kita melanjutkan, kalian perlu tahu bahwa konfigurasi awal EJBCA 6.15.2.1 dapat dibagi kedalam beberapa bagian yaitu:
- file-file .properties yang ada dalam folder /opt/ejbca/conf
- file keystore awal yang terdapat pada folder /opt/ejbca/p12
- config Wildfly di standalone.xml
Kalian juga perlu tahu bahwa beberapa aturan umum untuk bekerja dengan konfigurasi EJBCA 6.15,2,1, diantaranya:
- Pertama, anggap bahwa tidak akan ada konfigurasi yang berubah selama proses deploy dan hanya file ejbca.ear yang tersentuh dalam aksi kali ini.
- Database mariaDB akan terisi secara otomatis saat pertama kali kita melakukan proses deploy, tapi sebaliknya tidak akan tersentuh oleh script ant apapun.
- Database tidak akan menyimpan data konfigurasi apapun, tetapi akan berpengaruh jika ada perubahan pada konfigurasi yang kita buat.
- Perintah ant.install mencoba untuk membuat file keystore setiap kali perintah tersebut dijalankan, meskipun file-file tersebut ada.
- porsi dari standalone.xml dapat diubah baik oleh ant build atau ant install, tetapi hal tersebut hanya menanggapi perubahan yang kita buat pada file *.properties.
- Setelah instalasi awal selesai, ant tidak akan mengubah standalone.xml kecuali kita telah mengubah sebuah file .properties.
File Properties pada EJBCA 6.15.2.1
EJBCA 6.15.2.1 menggunakan text biasa pada file “.properties” untuk konfigurasi utamanya. File-file ini akan menjadi rujukan ketika kita meng-compile ejbca.ear dengan perintah ant, dan tidak menjadi referensi oleh aplikasi yang sedang berjalan.
- file install.properties hanya digunakan ketika menjalankan perintah ant install, dan bukan saat menjalankan ant deployear.
- Beberapa file sebenarnya berisi paremeter yang menyediakan parsing runtime dari variabel-variabel pada file properties tersebut, tetapi fungsi ini di non-aktifkan secara default.
Pertama, EJBCA memiliki beberapa contoh dari semua file properties yang ada pada direktori /opt/ejbca/conf. Yang kita butuhkan adalah:
| Properties | Penjelasan |
|---|---|
| certstore.properties | mendefinisikan variabel penyimpanan sertifikat |
| cesecore.properties | mendefinisikan variabel core security engine |
| crlstore.properties | mendefinisikan variabel penyimpanan CRL |
| database.properties | mendefinisikan bagaimana EJBCA akan mengakses database |
| ejbca.properties | mendefinisikan variabel basic untuk EJBCA itu sendiri |
| install.properties | digunakan oleh "ant install" selama instalasi |
| mail.properties | mendefinisikan bagaiman EJBCA SMTP connector akan berfungsi |
| ocsp.properties | mendefinisikan bagaimana OCSP itu akan bekerja |
| va.properties | mendefinisikan bagaimana validation authority akan bekerja |
| va-publisher.properties | mendefinisikan bagaimana validation authority akan mengakses database |
| web.properties | mendefinisikan variabel untuk web interface EJBCA |
| externalra.properties | Mendefinisikan variabel untuk mengaktifkan ra yang berdiri sendiri (di luar EJBCA) |
| externalra-gui.properties | Mendefinisikan variabel untuk mengaktikan RA Eksternal dengan GUI |
Ada beberapa file jndi.* dalam folder conf tersebut. Mereka dibutuhkan, namun tidak akan diotak-atik lebih jauh, dan bisa diabaikan saja. Ada juga 2 folder lainnya yaitu logdevices dan plugins, yang bisa diabaikan juga.
Pertama, kita akan membuat direktori baru yang disebut /opt/ejbca/conf/sample dan memindahkan semua file .sample ke dalam folder tersebut untuk tujuan backup. Caranya:
cd /opt/ejbca/conf
mkdir sample
mv *.sample sample/
Lalu kemudian kita akan meng-copy beberapa file yang dibutuhkan ke direktori utamanya. Caranya:
cp sample/certstore.properties.sample certstore.properties
cp sample/cesecore.properties.sample cesecore.properties
cp sample/crlstore.properties.sample crlstore.properties
cp sample/database.properties.sample database.properties
cp sample/ejbca.properties.sample ejbca.properties
cp sample/install.properties.sample install.properties
cp sample/ocsp.properties.sample ocsp.properties
cp sample/mail.properties.sample mail.properties
cp sample/web.properties.sample web.properties

Kita akan mengkonfigurasi file-file ini kemudian menguji coba instalasinya sebelum melakukan tindakan. Dengan hanya file di atas tersebut maka EJBCA 6.15.2.1 akan beroperasi tanpa Validation Authority.
Mari kita mulai:
certstore.properties
### Start certstore.properties ###
# ———— RFC 4387 Certificate store configuration ———————
certstore.enabled=true
# This is the web directory that the web interface for the cert store will use.
# This is an unused alternate location
certstore.contextroot=/ejbca/publicweb/certificates
### End certstore.properties ###

cesecore.properties
### Start cesecore.properties ###
allow.external-dynamic.configuration=true
ca.keystorepass=!secret! #ganti dengan yang kamu inginkan
#ca.rngalgorithm=SHA1PRNG
ca.serialnumberoctetsize=8
ca.toolateexpiredate=80000000
certificate.validityoffset=-10m
#ca.toolateexpiredate=2038-01-19 03:14:08+00:00
#ca.doPermitExtractablePrivateKeys=true
ca.serialnumberoctetsize=20
#forbidden.characters = \n\r;!\u0000%`?$~
#intresources.preferredlanguage=EN
#intresources.secondarylanguage=SE
#These variables will enable explicit logging. You can turn them off later
securityeventsaudit.implementation.X=org.cesecore.audit.impl.log4j.Log4jDevice
securityeventsaudit.implementation.X=org.cesecore.audit.impl.integrityprotected.IntegrityProtectedDevice
#securityeventsaudit.implementation.0=null
#securityeventsaudit.implementation.1=null
#securityeventsaudit.exporter.X=org.cesecore.audit.impl.AuditExporterDummy (default)
#securityeventsaudit.exporter.X=org.cesecore.audit.impl.AuditExportCsv
#securityeventsaudit.exporter.X=org.cesecore.audit.impl.AuditExporterXml
#securityeventsaudit.deviceproperty.X.key.subkey=value
# More log config below
securityeventsaudit.implementation.0=org.cesecore.audit.impl.log4j.Log4jDevice
securityeventsaudit.implementation.1=org.cesecore.audit.impl.integrityprotected.IntegrityProtectedDevice
securityeventsaudit.exporter.1=org.cesecore.audit.impl.AuditExporterXml
#securityeventsaudit.deviceproperty.1.export.dir=/tmp/
#securityeventsaudit.deviceproperty.1.export.fetchsize=1000
#securityeventsaudit.deviceproperty.1.validate.fetchsize=1000
#ecdsa.implicitlyca.q=883423532389192164791648750360308885314476597252960362792450860609699839
#ecdsa.implicitlyca.a=7fffffffffffffffffffffff7fffffffffff8000000000007ffffffffffc
#ecdsa.implicitlyca.b=6b016c3bdcf18941d0d654921475ca71a9db2fb27d1d37796185c2942c0a
#ecdsa.implicitlyca.g=020ffa963cdca8816ccc33b8642bedf905c3d358573d3f27fbbd3b3cb9aaaf
#ecdsa.implicitlyca.n=883423532389192164791648750360308884807550341691627752275345424702807307
End cesecore.properties ###

crlstore.properties
### Start crlstore.properties ###
# This is all very similar to certstore.properties
# ———— RFC 4387 CRL store configuration ———————
crlstore.enabled=true
#crlstore.contextroot=/crls
crlstore.contextroot=/ejbca/publicweb/crls
#### End crlstore.properties ###

database.properties
### Start database.properties ###
# ————- Database configuration ————————
#This variable is used in our standalone.xml <datasource> stanza
datasource.jndi-name=EjbcaDS
# This is the TYPE of db, not the NAME OF the db
database.name=mysql
# Be sure to use utf-8
database.url=jdbc:mysql://127.0.0.1:3306/<nama_db>?characterEncoding=UTF-8
database.driver=org.mariadb.jdbc.Driver
#username mysql yang sudah kamu buat:
database.username=ejbcadbuser
# password mysql yang sudah kamu buat:
database.password=pumpkin
#### End database.properties ###

ejbca.properties
###Start ejbca.properties ###
# The next two variables are very important…
appserver.home=/opt/wildfly
appserver.type=jboss
# Initially, we will set this to false. Once the install is complete, we change
# this to true.
#ejbca.productionmode=true
ejbca.productionmode=false
allow.external-dynamic.configuration=true
# Don’t set these!
#ca.xkmskeystorepass=
#ca.cmskeystorepass=
approval.defaultrequestvalidity=28800
approval.defaultapprovalvalidity=28800
#approval.excludedClasses=org.ejbca.extra.caservice.ExtRACAServiceWorker
#approval.excludedClasses=org.ejbca.core.protocol.cmp.CmpMessageDispatcherSessionBean
#approval.excludedClasses=org.ejbca.core.protocol.cmp.RevocationMessageHandler
#approval.excludedClasses=
healthcheck.amountfreemem=32
healthcheck.dbquery=Select 1 From CertificateData where fingerprint=’XX’
healthcheck.authorizedips=127.0.0.1
healthcheck.catokensigntest=true
healthcheck.publisherconnections=true
#healthcheck.maintenancefile=~/maintenance.properties
#healthcheck.maintenancepropertyname=DOWN_FOR_MAINTENANCE
healthcheck.okmessage=ALLOK
healthcheck.sendservererror=true
#healthcheck.customerrormessage=EJBCANOTOK
# It’s important to change this to 8:
ejbca.passwordlogrounds=8
#——————- CLI settings ————-
ejbca.cli.defaultusername=apaaja
ejbca.cli.defaultpassword=bebaspokoknya
### End ejbca.properties ###


install.properties
### This file is essentially an “answer file” used when running the “ant install” command.
### The variables listed here are *not* used by ejbca while it is running.
### Start install.properties ###
# In every case that “CA” is mentioned in this file, it refers to the “management” CA ONLY.
# This will be the initial name of the management CA instance
# ejbca will use this for administration purpose, not your production CAs
# Note that the CN given here is NOT the FQDN of your CA!
# Why does this matter? This certificate will be temporarily installed
# on your browser as a trusted root CA, but will not be communicated
# with.
ca.name=mgmtca
ca.dn=CN=mgmtca,O=Your Company,C=ID
# The token type the administrative CA will use.
ca.tokentype=org.cesecore.keys.token.PKCS11CryptoToken
# This is the path to a “catoken.properties” file that will be created when ‘ant
# install’ is run. It will contain encryption parameters used by the mgmt CA.
# It is only used with hard encryption tokens, and can be ignored if your certs
# will be stored in the ejbca database (which is were we will be putting them.)
# Configuration file were you define key name, password and key alias for the HSM
ca.tokenproperties=/opt/ejbca/conf/catoken.properties
# THIS IS IMPORTANT
# You can assume that ejbca cannot use EC algorithms for the management CA.
# This does not mean that ejbca cannot issue certificates that use EC.
# It just means that the management CA will use RSA for internal purposes.
# The reason for this limitation is that the various EC algorithms are
# not equally supported by the various java flavors that could be used.
# More importantly, ejbca does not include any sort of logic to identify
# the version of java you are using to limit or correct your options.
# Choosing an unsupported algorithm here leads to a corrupt installation.
# This can waste a great amount of time, so just avoid EC.
# You can use EC later with the actual production CAs you define.
# Keyspec for RSA keys is size of RSA keys (1024, 2048, 4096, 8192).
ca.keyspec=2048
# The keytype for the administrative CA, can be RSA, ECDSA or DSA
ca.keytype=RSA
# Even though SHA1 is still largely in use as a certificate hashing
# algorithm, I *strongly* suggest that you go with SHA256WithRSA.
# Also, please note that the “with/With” in the hash names is indeed case-sensitive.
# Stay classy, Oracle.
# SHA1WithRSA, SHA1withECDSA, SHA256WithRSA, SHA256withECDSA.
ca.signaturealgorithm=SHA256WithRSA
# I set a CA validity of 10 years (including the leap years, rain man)
ca.validity=5650
ca.policy=null
ca.certificateprofile=ROOTCA
### End install.properties ###

web.properties
### Start web.properties ###
# The key to this portion of the config is understanding that this file affects
# the certificate used by the ejbca admin webpage. In install.properties, we
# defined variables for the management CA root certificate. But that certificate
# is not used for session TLS. The management CA issues a separate “server
# certificate” for that purpose that is defined here.
# ———— Web GUI configuration ———————
# Can not be set to false, commented away means that web will be configured.
#web.noconfigure=true
# Can not be set to false, commented away means that web will be configured.
# web.nosslconfigure=true
java.trustpassword=gantiapaaja
superadmin.cn=superadmin
superadmin.dn=CN=${superadmin.cn},O=Your Company,C=ID
superadmin.password=ejbca
superadmin.batch=true
# You do not need to set this password!
#httpsserver.password=serverpwd
httpsserver.hostname=rootca.domainlo.net
httpsserver.dn=CN=${httpsserver.hostname},O=Your Company,C=ID
# This is the port that will host the unencrypted Ejbca Public Web page.
# Note that this will be used the CRL and OSCP URLs, although it will be NATted to port 80 by our firewall rules.
httpserver.pubhttp=8080
# This is the port that will host the encrypted Ejbca Public Web page, *without* client certificate authentication.
httpserver.pubhttps=8442
# This is the port that will host the encrypted Ejbca Public Web page,
# as well as the Administration page. Accessing content hosted on
# this port requires client certificate authentication.
# Note that the Ejbca Public Web page link to the administration
# page will try to include this port in the URL, regardless of any
# port redirection you may be using. This will fixed at the end of
# the how-to.
httpserver.privhttps=8443
# Trying to use port 443 will not work here, as it is a “privileged” port.
#httpserver.external.privhttps=443
#Don’t set these up unless you use an apache proxy for port translation
#httpserver.external.fqdn=
#httpserver.external.fqdn=${httpsserver.hostname}
#httpsserver.bindaddress.pubhttp=0.0.0.0
#httpsserver.bindaddress.pubhttps=0.0.0.0
#httpsserver.bindaddress.privhttps=0.0.0.0
# Who let the Swedes in here?
#web.availablelanguages=EN,DE,ES,FR,IT,JA,PT,SE,UA,ZH,BS
web.availablelanguages=EN,DE,ES,FR,IT,JA,PT,UA,ZH,BS
web.contentencoding=UTF-8
# Well, this doesn’t sound like a good idea.
#hardtoken.diplaysensitiveinfo=true
#web.docbaseuri=disabled
#web.docbaseuri=internal
#web.docbaseuri=http://www.ejbca.org
#web.reqcertindb=true
web.selfreg.enabled=false
web.selfreg.defaultcerttype=1
web.selfreg.certtypes.1.description=User certificate
web.selfreg.certtypes.1.eeprofile=SOMEPROFILE
web.selfreg.certtypes.1.certprofile=ENDUSER
#web.selfreg.certtypes.1.usernamemapping=CN
web.renewalenabled=false
#web.manualclasspathsenabled=true
#web.errorpage.notification=An exception has occurred.
web.errorpage.notification=ZOMG PWND!!!!!!!!!!
# This setting is good for a lab environment. Don’t use this in production.
web.errorpage.stacktrace=true
#web.enableproxiedauth=true
web.log.adminremoteip=true
#web.log.adminforwardedip=true
#### End web.properties ###


Deploy EJBCA 6.15.2.1
Sekarang kita sudah punya file properties yang sudah dimodifikasi. Kita bisa memulai untuk build dan deploy EJBCA ke Wildfly, tanpa menyentuh konfigurasi konfigurasi Wildfly, dengan menjalankan perintah EJBCA.
Sebelum menjalankan perintah deployear, jangan lupa untuk mengarahkan application server pada APPSRV_HOME dan konfigur database pada conf/database.properties.
Jalankan perintah ini pada command prompt di EJBCA_HOME
cd /opt/ejbca
ant deployear

- Kalian harus selalu menjalankan ant dari folder /opt/ejbca, tempat dimana build.xml berada. kita bisa saja menggunakan path menuju folder ejbca tersebut ketika mengeksekusi perintah ant, namun lebih mudah apabila kita pindah langsung ke folder /opt/ejbca.
- dan yang terakhir, Wildfly harus terlebih dahulu berjalan sebelum kita menjalankan perintah ant.
Deployment yang kita lakukan menarik informasi dari file konfigurasi, menggunakan informasi tersebut untuk meng-compile file ejbca.ear, kemudian mendorong wildfly untuk men-deploy-nya. Karena ini deployment pertama, ant juga melakukan hal berikut:
- Menambahkan konfigurasi mail ejbca ke file standalone.xml
- menambahkan ejbca datasource ke file standalone.xml
- membuat tabel pada database dengan skema awal
Periksa Wildfly console atau log yang ada untuk memastikan tidak ada error yang terjadi pada saat proses deploy.
Run Install
setelah proses deployear berjalan mulus tanpa ada masalah, sekarang adalah waktunya melakukan run install. Caranya:
ant runinstall


Deploy TLS Keystore ke dalam WildFLy
Setelah install, TLS keystores telah berhasil dibuat. Jalankan perintah berikut untuk meng-copy keystore tersebut ke wildfly_home/standarlone/config/keystore.
ant deploy-keystore

Menghapus TLS dan Konfigurasi HTTP yang Sudah Ada
Jalankan perintah berikut pada JBOSS CLI untuk menhapus konfigurasi TLS dan HTTP yang sudah ada (hanya untuk keamanan).
/subsystem=undertow/server=default-server/http-listener=default:remove
/subsystem=undertow/server=default-server/https-listener=https:remove
/socket-binding-group=standard-sockets/socket-binding=http:remove
/socket-binding-group=standard-sockets/socket-binding=https:remove
:reload

Tunggu proses reload hingga benar-benar selesai dengan memeriksa log server sebelum melanjutkan ke proses selanjutnya.
Konfigure TLS
Jalankan perintah berikut pada JBOSS CLI (jboss-cli.sh -c) untuk mengatur konfigurasi TLS.
Tambahkan interfaces, gunakan 0.0.0.0 agar bisa diakses dari luar:
/interface=http:add(inet-address="0.0.0.0")
/interface=httpspub:add(inet-address="0.0.0.0")
/interface=httpspriv:add(inet-address="0.0.0.0")
/socket-binding-group=standard-sockets/socket-binding=http:add(port="8080",interface="http")
/subsystem=undertow/server=default-server/http-listener=http:add(socket-binding=http)
/subsystem=undertow/server=default-server/http-listener=http:write-attribute(name=redirect-socket, value="httpspriv")
:reload

Tunggu proses reload hingga benar-benar selesai dengan memeriksa log server sebelum melanjutkan ke proses selanjutnya.
Konfigur identities dan socket bindings:
update keystore alias agar cocok dengan httpsserver.hostname yang ada pada web.properties. Jangan lupa juga untuk update keystore-password untuk keystore.jks agar cocok dengan httpsserver.password dan keystore-password untuk trustore.jks agar cocok dengan java.trustore pada web.properties:
*pastikan kalau password pada sesi ini sesuai. Kalau tidak, maka proses akan gagal. Untuk kalian yang melakukannya pada production, password harus benar-benar diganti ke password yang sesuai.
/core-service=management/security-realm=SSLRealm:add()
/core-service=management/security-realm=SSLRealm/server-identity=ssl:add(keystore-path="${jboss.server.config.dir}/keystore/keystore.jks", keystore-password="serverpwd", alias="localhost")
/core-service=management/security-realm=SSLRealm/authentication=truststore:add(keystore-path="${jboss.server.config.dir}/keystore/truststore.jks", keystore-password="changeit")
/socket-binding-group=standard-sockets/socket-binding=httpspriv:add(port="8443",interface="httpspriv")
/socket-binding-group=standard-sockets/socket-binding=httpspub:add(port="8442", interface="httpspub")

Restart Wildfly sampai benar-benar berjalan kembali. Periksa log untuk benar-benar memastikannya
Setelah me-restart Wildfly, sekarang jalankan perintah berikut:
/subsystem=undertow/server=default-server/https-listener=httpspriv:add(socket-binding=httpspriv, security-realm="SSLRealm", verify-client=REQUIRED)
/subsystem=undertow/server=default-server/https-listener=httpspriv:write-attribute(name=max-parameters, value="2048")
/subsystem=undertow/server=default-server/https-listener=httpspub:add(socket-binding=httpspub, security-realm="SSLRealm")
/subsystem=undertow/server=default-server/https-listener=httpspub:write-attribute(name=max-parameters, value="2048")
:reload

Untuk finalisasi, jalankan perintah berikut:
/system-property=org.apache.tomcat.util.buf.UDecoder.ALLOW_ENCODED_SLASH:add(value=true)
/system-property=org.apache.catalina.connector.CoyoteAdapter.ALLOW_BACKSLASH:add(value=true)
/system-property=org.apache.catalina.connector.URI_ENCODING:add(value="UTF-8")
/system-property=org.apache.catalina.connector.USE_BODY_ENCODING_FOR_QUERY_STRING:add(value=true)
/subsystem=webservices:write-attribute(name=wsdl-host, value=jbossws.undefined.host)
/subsystem=webservices:write-attribute(name=modify-wsdl-address, value=true)
:reload

Lebih Detail soal Ant
Kenapa kita melakukan ant deploy sebelum melakukan ant install? ada dua alasannya:
- untuk menguji file ejbca.ear sukses di-compile dari apa yang sudah kita bangun sejauh ini. Menjalankan ant deploy sambil membaca log memberikan kita sebuah kesempatan untuk memperbaiki kesalahan sebelum lanjut ke tahap selanjutnya. Setelah instalasi komplit, akan jauh lebih sulit untuk memperbaiki kesalahan-kesalahan yang terjadi pada konfigurasi.
- yang lebih penting lagi, file ejbca.ear haruslah ada sebelum file install dapat dieksekusi.
Memang perlu meluangkan waktu sedikit untuk menggambarkan dengan lebih detil apa saja yang dilakukan oleh beragam perintah ant dan belajar beberapa hal yang baru. Mempelajari ant akan sangat berguna ketika memperbaiki beberapa kendala yang terjadi saat instalasi.
- Seperti yang kita tau, skrip ant deploy membuat beberapa file sementara yang digunakan untuk meng-compile ejbca.ear, meng-compile ejbca.ear, dan kemudian mendorong jboss untuk mendeploy-nya. Ada dua fungsi yang berbeda di sini yaitu:
pertama, ant menjalankan build yang melakukan persiapan dan kompilasi.
kedua, ant menggunakan jboss jee.deploy untuk melakukan transfer ke jboss. - proses build dapat dipanggil dengan menggunakan perintah ant build. namun perintah ant deploymenjalankan keduanya, build dan deploy.
- skrip ant install mengambil file konfigurasi kita, menggunakan informasi tersebut untuk menciptakan konfigurasi yang lebih jauh lagi (seperti file keystore), dan meng-copy file-file baru tersebut ke lokasi-lokasi yang lebih tepat. Bermacam perubahan pada jboss juga dibuat oleh skrip ini. dan full deployment harus dijalankan secara manual setelah instalasi selesai.
Sebuah skrip terpisah untuk instalasi dibutuhkan untuk memisahkan hal yang dilakukan hanya sekali (seperti mengenerate keystore) dari hal yang dilakukan berulang-ulang saat deployment. Kita tidak perlu membangun ulang setiap kali kita ingin deploy. - perintah ant clean akan menghapus file-file temporary (sementara) yang dihasilkan saat deployment sebelumnya yang mungkin secara tidak sengaja masih ada atau tertinggal. Menghapus file-file temporary tersebut dapat membantu memecahkan error-error yang muncul saat deployment.
- jika kalian tetap menerima error selama deployment setelah melakukan ant clean, kalian boleh mencoba sebuah perintah yng sudah usang: ant bootstrap. Secara teori, semua fungsi ant bootstrap sekarang dijalankan oleh ant deploy.
Keystore
Keystore menyimpan sertifikat yang digunakan oleh EJBCA 6.15.2.1 untuk mengamankan web portal, tidak lebih. Keberadaan mereka selama instalasi membuat mereka sangat penting, tetapi mereka memiliki sedikit relevansi dengan fungsi “Certificate Authority” dari EJBCA 6.15.2.1
- Mereka tidak digunakan untuk menyimpan kunci dan sertifikat yang dihasilkan oleh EJBCA setelah aplikasi ini live di production – informasi tersebut disimpan di dalam database.
- pada sebuah instalasi yang terdistribusi, mereka mempunyai peran penting dalam autentikasi lintas server (cross-server).
ketika skrip install berjalan, skrip tersebut akan melakukan bermacam operasi sampai akhirnya membawa kita untuk memasukkan beberapa password yang digunakan untuk file-file keystore. File-file keystore tersebut berada di /opt/ejbca/p12 dan mereka adalah:
- tomcat. jks → Menyimpan sertifikat yang digunakan jboss untuk mengamankan web portal EJBCA 6.15.2.1 dengan TLS.
- trustore.jks → menyimpan sebuah copy dari key root CA yang mengeluarkan sertifikat TLS.
Setelah pembuatan, file-file ini di-copy oleh script install tersebut ke /opt/jboss/standalone/configuration/keystore, dan file tomcat.jks di rename menjadi keystore.jksdi direktori baru.
Penting untuk dimengerti bahwa ketika ant membuat keystore di /opt/ejbca/p12, jboss menggunakan keystore yang berada pada /opt/jboss/standalone/configuration/keystore untuk TLS.
- file superadmin.p12 yang berisi sertifikat klien yang digunakan untuk mengautentikasi akun administrator juga berada di /opt/ejbca/p12. file ini tidak di copy ke direktori jboss seperti keystore lainnya.
Java tool yang digunakan untuk mengatur keystore disebut keytool, dan (saat instalasi) keytool tersebut dipanggil oleh sebuah link pada /usr/bin. Melalui alternatives, link ini diarahkan ke /usr/lib/jvm/java-1.8.0-openjdk-amd64/bin/keytool. Untuk mencegah terjadinya beberapa masalah yang mungkin muncul (karena menggunakan enkripsi EC), gunakan enkripsi RSA untuk keystore kita. seperti contoh di atas.
Seperti telah disebutkan tadi, ant install menghasilkan copy awal dari keystore yang didasarkan pada konfigurasi kita di install.properties dan web.properties. Tergantung dari bagaimana kita mengkonfigurasi file-file tersebut, kalau kita banyak mengisi informasi pada kedua file tersebut, maka kita tidak akan diminta untuk menginput lagi pada saat ant install dijalankan.
Pengujian
Untuk membuktikan apakah instalasi sudah berjalan dengan benar, caranya adalah masuk ke browser dan ketikkan alamat berikut:
http://<ip atau domain>:8080
Maka akan muncul halaman berikut:

dan untuk masuk ke halaman EJBCA-nya, tambahkan /ejbca setelah port tersebut. maka akan tampil halaman berikut:

Notes:
Tulisan ini merupakan hasil pengujian dari blog ejbcacentos dengan melakukan beberapa modifikasi sesuai dengan kebutuhan dan juga mengambil beberapa konfigurasi dari SINI.
Integrasi EJBCA dengan SoftHSM
Untuk mengintegrasikan antara EJBCA 6.15.2.1 denggan SoftHSM, silakan baca pada LINK ini.