

Sebelum memulai tahap ini, pastikan bahwa Management CA sudah terinstal dan berjalan dengan baik (Baca cara instalasi EJBCA disini). Setelah sudah yakin kalau Management CA berjalan dengan baik, barulah kita bisa menambahkan fungsi validasi kepada server kita. Untuk proses validasi ini, Primekey memasukkan setiap proses yang melakukan validasi sertifikat (CMP, OCSP, Distribusi CRL) sebagai bagian dari “Validation Authority”.
Merujuk pada Diagram Layout logical ASCII berikut:
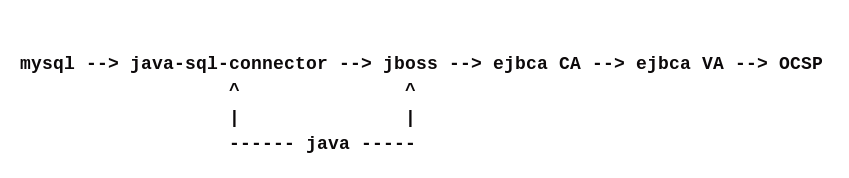
Apa yang tidak diperlihatkan oleh diagram ini adalah VA (Validation Authority) memiliki datasource Jboss tersendiri yang berbeda dari datasource yang digunakan oleh CA (Certifictaion Authority). Namun, dalam environment standalone, koneksi ini mengarah ke database yang sama (database ejbca) yang digunakan oleh CA.
- Mendfinisikan datasource VA adalah tujuan utama dari file va-publisher.properties (file berada di /opt/ejbca/conf/ setelah di copy dari /opt/ejbca/conf/sample/).
- seperti datasource CA, konfigurasi datasource VA juga akan ditambahkan ke dalam file standalone.xml selama deployment. (setelah file . properties yang spesifik dengan VA dibuat).
- Perlu dicatat bagaimana PrimeKey menggunakan istilah “Publisher”. Publisher ini digunakan untuk menggambarkan gagasan tentang informasi dari komponen “publishing” EJBCA (dari sebuah datasource) ke sebuah server terpisah pada sebuah instalasi EJBCA yang terdistribusi.
- Misalkan server standalone kita hanya “publishing” ke service VA-nya sendiri , kita masih membutuhkan “publisher” untuk dimasukkan dalam va-publisher.properties.
- file va.properties menjelaskan operasi VA secara umum seperti fungsi pemeriksaan kesehatan (healthcheck).
- file ocsp.properties mendefinisikan fungsionalitas protokol OCSP.
- File va.properties berisi instruksi spesifik bagaimana mengizinkan download CRL/OCSP alias untuk beberapa (multiple) instance CA.
Langkah pertama untuk menjalankan VA adalah membuat file-file properties yang terkait validasi pada direktori /opt/ejbca/conf. caranya:
cd /opt/ejbca/conf
cp sample/ocsp.properties.sample ocsp.properties
cp sample/va.properties.sample va.properties
cp sample/va-publisher.properties.sample va-publisher.properties
Konfigurasi file-file Validation Authority
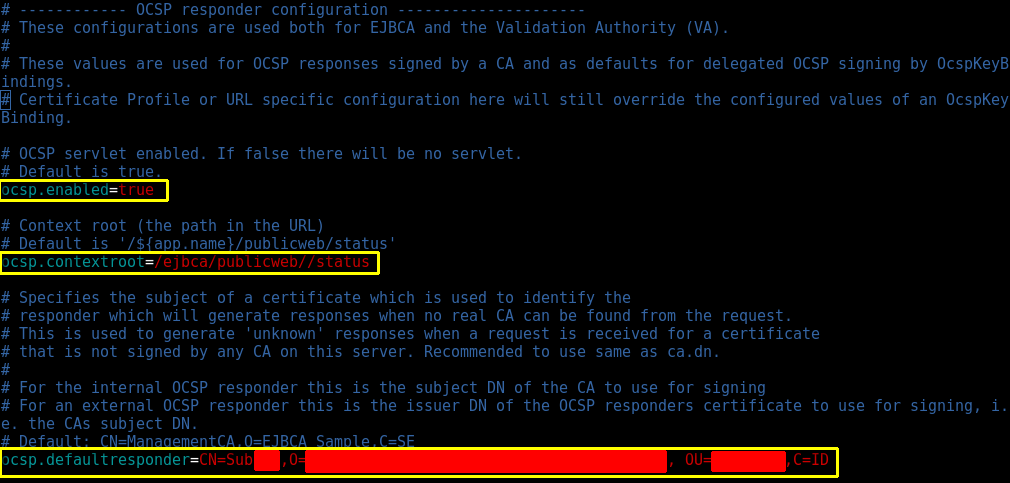
ocsp.properties
### Start ocsp.properties ###

 # ------------ OCSP responder configuration ---------------------

 ocsp.enabled=true
 #ocsp.enabled=false

 # ini path untuk URL OCSP
 ocsp.contextroot=/ejbca/publicweb/status
 #ocsp.contextroot=/status

 # ini adalah DN dari CA yang akan merespon untuk serifikat yang gak dikenal
 ocsp.defaultresponder=CN=NamaCALo,O=PerusahaanLo,C=ID

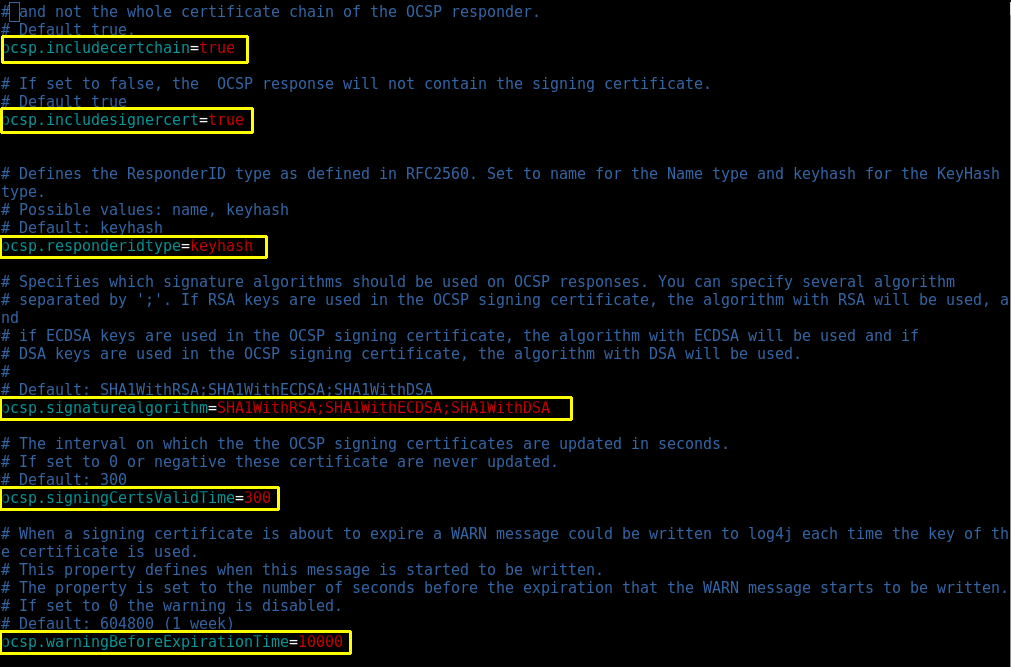
 ocsp.includecertchain=true
 ocsp.includesignercert=true
 ocsp.responderidtype=keyhash
 ocsp.signaturealgorithm=SHA1WithRSA;SHA1WithECDSA;SHA1WithDSA
 ocsp.signingCertsValidTime=300
 ocsp.warningBeforeExpirationTime=10000

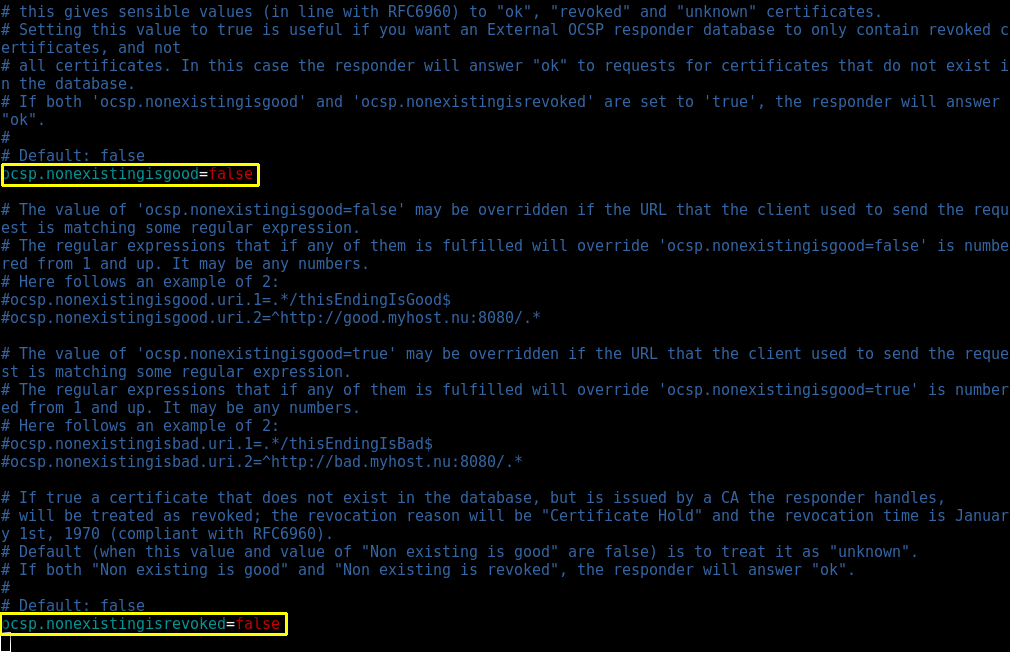
 ocsp.nonexistingisgood=false

 #ocsp.nonexistingisgood.uri.1=.*/thisEndingIsGood$
 #ocsp.nonexistingisgood.uri.2=^http://good.myhost.nu:8080/.*
 #ocsp.nonexistingisbad.uri.1=.*/thisEndingIsBad$
 #ocsp.nonexistingisbad.uri.2=^http://bad.myhost.nu:8080/.*
 ocsp.nonexistingisrevoked=false
 #ocsp.nonexistingisrevoked.uri.1=.*/thisEndingIsRevoked$
 #ocsp.nonexistingisrevoked.uri.2=^http://revoked.myhost.nu:8080/.*

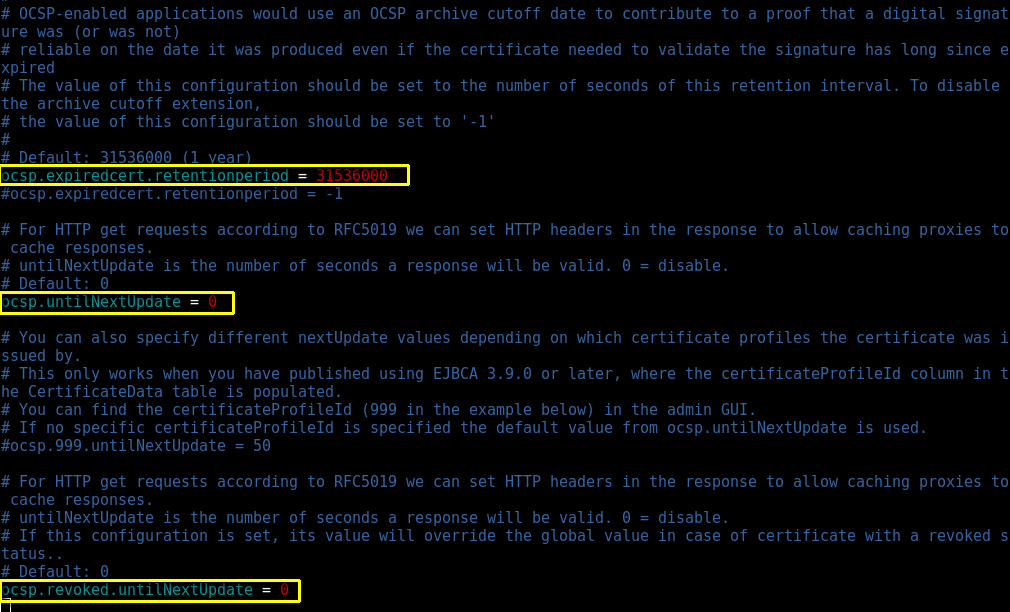
 ocsp.expiredcert.retentionperiod = 31536000
 #ocsp.expiredcert.retentionperiod = -1

 ocsp.untilNextUpdate = 0
 #ocsp.999.untilNextUpdate = 50
 ocsp.revoked.untilNextUpdate = 0
 #ocsp.999.revoked.untilNextUpdate = 50
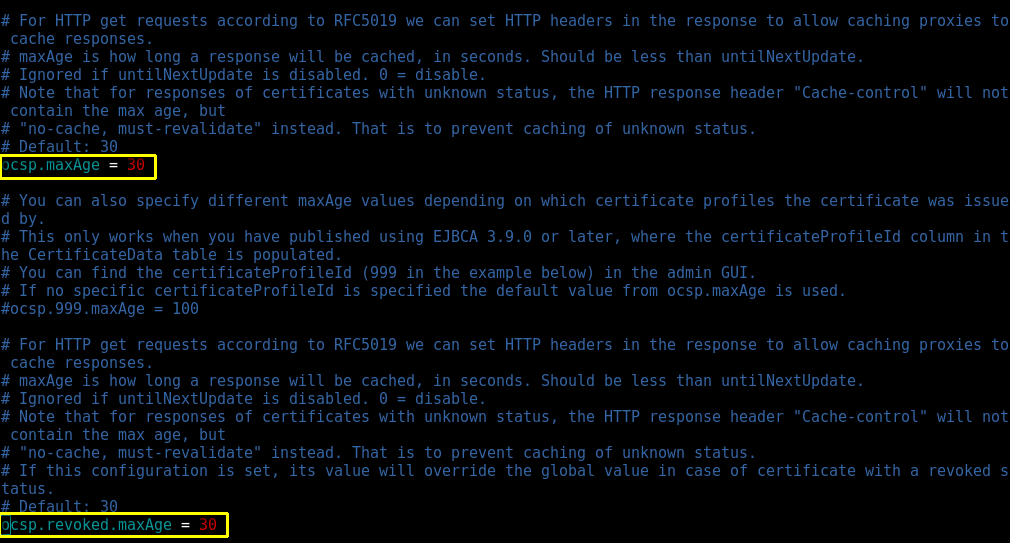
 ocsp.maxAge = 30
 #ocsp.999.maxAge = 100
 ocsp.revoked.maxAge = 30
 #ocsp.999.revoked.maxAge = 100

 #ocsp.extensionoid=
 #ocsp.extensionclass=

 #ocsp.uniddatsource=
 #ocsp.unidtrustdir=
 #ocsp.unidcacert=
 #ocsp.signaturerequired=false

 #ocsp.rekeying.trigging.password=
 #ocsp.rekeying.wsurl = https://milton:8443/ejbca/ejbcaws/ejbcaws
 #ocsp.rekeying.update.time.in.seconds=
 #ocsp.rekeying.safety.margin.in.seconds=
 #ocsp.rekeying.trigging.hosts=

 # Default: false
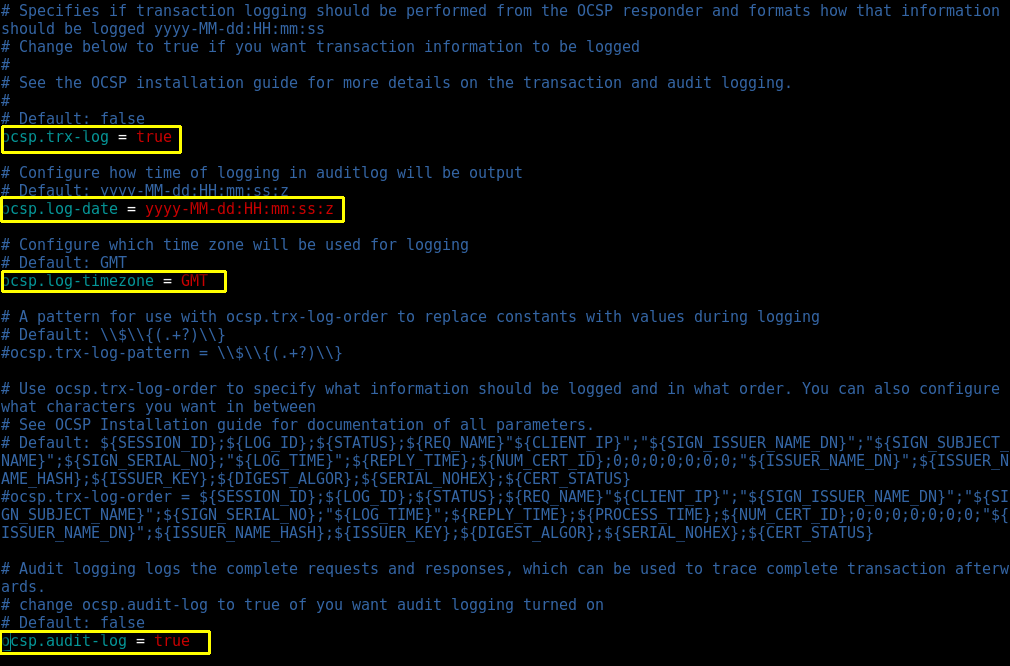
 ocsp.trx-log = true
 ocsp.log-date = yyyy-MM-dd:HH:mm:ss:z
 #ocsp.log-timezone = GMT
 #ocsp.trx-log-pattern = \\$\\{(.+?)\\}
 # The next line will probably line-wrap in your browser:
 #ocsp.trx-log-order = ${SESSION_ID};${LOG_ID};${STATUS};${REQ_NAME}"${CLIENT_IP}";"${SIGN_ISSUER_NAME_DN}";"${SIGN_SUBJECT_NAME}";${SIGN_SERIAL_NO};"${LOG_TIME}";${REPLY_TIME};${PROCESS_TIME};${NUM_CERT_ID};0;0;0;0;0;0;0;"${ISSUER_NAME_DN}";${ISSUER_NAME_HASH};${ISSUER_KEY};${DIGEST_ALGOR};${SERIAL_NOHEX};${CERT_STATUS}

 ocsp.audit-log = true
 #ocsp.audit-log-pattern = \\$\\{(.+?)\\}
 # The next line will probably line-wrap in your browser:
 #ocsp.audit-log-order = SESSION_ID:${SESSION_ID};LOG ID:${LOG_ID};"${LOG_TIME}";REPLY TIME:${REPLY_TIME};\nTIME TO PROCESS:${PROCESS_TIME};\nOCSP REQUEST:\n"${OCSPREQUEST}";\nOCSP RESPONSE:\n"${OCSPRESPONSE}";\nSTATUS:${STATUS}
 #ocsp.log-safer = true


 ### End ocsp.properties ###
va.properties
### Start va.properties ###

 #------------------- Validation Authority (VA) Healthcheck settings -------------
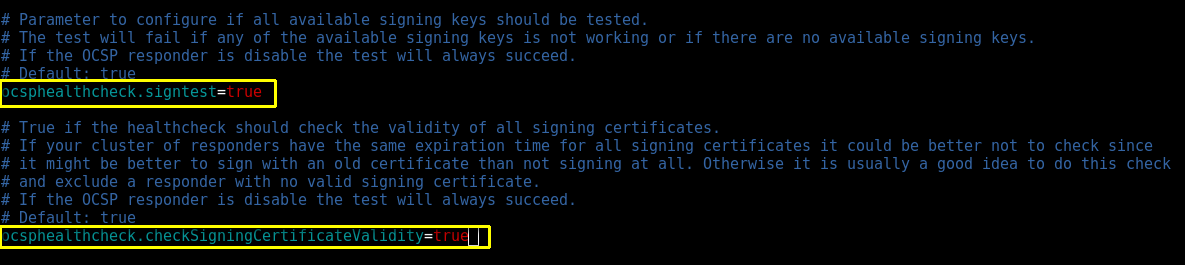
 ocsphealthcheck.signtest=true
 ocsphealthcheck.checkSigningCertificateValidity=true


 # PrimeKey's instructions here are particularly terrible. Let me see if I can translate:

 # In this last setting, we will define an alias 'root' for a particular RFC 4985 Section 2.1 "Search Key ID Hash" or "sKIDHash"
 # Our example sKIDHash is:'O4RdnGNf3WPioslAQsX71aR1/MI'
 # sKIDHashes are unique to each CA instance that you run on your ejbca server.

 # This has the effect of making the following URLs equivalent. This simplifies the entries in your certificates that specify
 # CRL/OCSP download locations, and grants the ability to have simultaneous CRL/OCSP download URLs
 # Typically, you will define a unique sKIDHash alias for each of your CA instances.

 # Example URL for certificate search: http://myhost.com:8080/certificates/search.cgi?sKIDHash=O4RdnGNf3WPioslAQsX71aR1/MI
 # This will be the same as http://myhost.com:8080/certificates/search.cgi?alias=root

 # Example URL for CRL download: http://myhost.com:8080/crls/search.cgi?sKIDHash=O4RdnGNf3WPioslAQsX71aR1/MI
 # is the same as http://myhost.com:8080/crls/search.cgi?alias=root

 # Example URL for Delta CRL download: http://myhost.com:8080/crls/search.cgi?sKIDHash=O4RdnGNf3WPioslAQsX71aR1/MI&delta=
 # is the same as http://myhost.com:8080/crls/search.cgi?alias=root&delta=


 # To determine the hash to use here, navigate to http://yourhost.com:8080/crls/search.cgi or http://yourhost.com:8080/certificates/search.cgi
 # (Omit the :8080 if you are browsing from somewhere other than localhost)
 # This URL will give you a list of the unique validation identifiers (including the sKIDHash) for each of your defined CAs.

 # Copy the sKIDHashes for the CA instances. Remember, you will have more than one, and you can omit the Management CA as it is solely internal to ejbca.
 # Add an entry like the one below for each of your CAs, paste the sKIDHash into the entry, then redeploy ejbca.


 #va.sKIDHash.alias.root=O4RdnGNf3WPioslAQsX71aR1/MI

 ### End va.properties ###
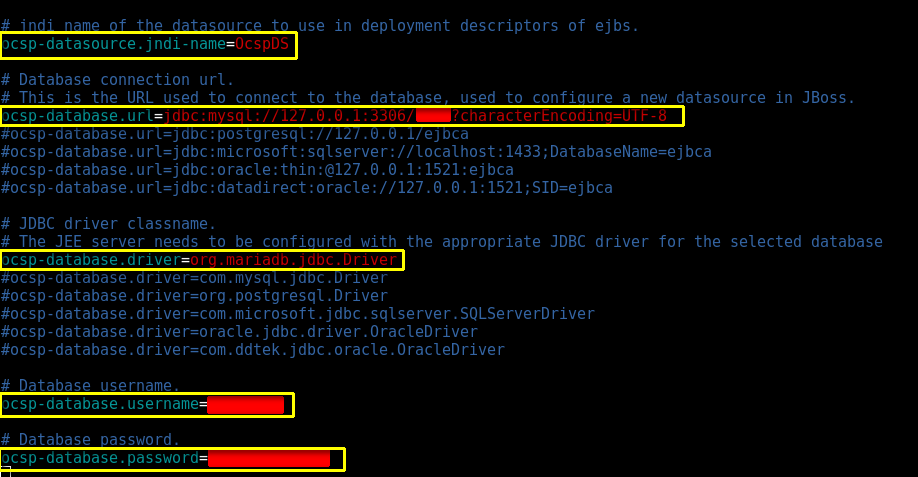
va-publisher.properties
Start va-publisher.properties ###

 #-------------- Validation Authority(VA) publisher db configuration-------------------------
 # All the "ocsp-database.*" properties are used to configure the VA connection to the database.
 #
 # In "PrimeKeyese": Configure these options if you are configuring EJBCA that will publish
 # certificates to a VA.


 ocsp-datasource.jndi-name=OcspDS
 ocsp-database.url=jdbc:mysql://127.0.0.1:3306/ejbcadb?characterEncoding=UTF-8
 ocsp-database.driver=com.mysql.jdbc.Driver
 ocsp-database.username=ejbcadbuser


 # password Databasenya diatur di sini
 ocsp-database.password=asalaja

 ### End va-publisher.properties ###
Untuk membuat VA berjalan, kita perlu mengeksekusi beberapa perintah yang sama sebelum kita melakukan deployment awal:
su - jboss
cd /opt/jboss/bin
ps -ax | grep jboss
kill -9 <proses_jboss>
chown -R jboss:jboss /opt/jboss-as-7.1.1.Final
chown -R jboss:jboss /opt/ejbca_ce_6_2_0
nohup ./standalone.sh -b 0.0.0.0 -bmanagement=0.0.0.0 &
cd /opt/ejbca
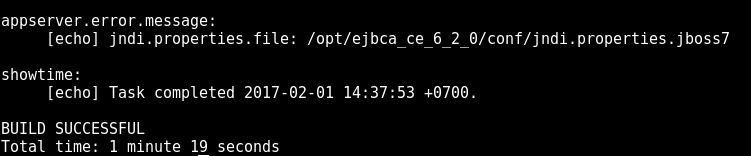
ant deploy
ingat bahwa dalam ocsp.properties, kita mendefinisikan “ocsp.defaultresponder“. Ini adalah DN dari CA yang akan menjawab permintaan OCSP untuk CA yang tidak diketahui. Primekey merekomendasikan agar kita menggunakan Management CA (Root CA) untuk ini. Namun, alangkah lebih baiknya bila kuta menggunakan default CA (Sub CA) untuk tujuan ini atau kita menggunakan Sebuah SubCA yang kita buat terlebih dahulu.
sampai SubCA itu berhasil dibuat, kita akan melihat pesan berikut dalam console log (nohup.out):

dan terakhir, kalau terjadi masalah dengan file va-publisher.properties milik kita, mungkin kita akan melihat pesan berikut:
06:31:45,632 WARN [org.ejbca.core.protocol.certificatestore.CertificateCache] (MSC service thread 1-2) org.bouncycastle.ocsp.OCSPException: problem creating ID: java.security.NoSuchProviderException: no such provider: BC
“BC” adalah Bouncycastle (OCSP Java Module)
Itu tadi cara menambahkan Validation Authority ke dalam EJBCA. Untuk pengujian VA tersebut, nantikan postingan selanjutnya ya.
Adios!!!

Comments are closed.